These steps apply to any Trimble servo or robotic instrument connected to the controller, except a Trimble SX10 or SX12 scanning total station.
If you are connected to a mechanical Trimble total station, you must adjust it using the control panel on the instrument
- Set up the instrument on a stable surface.
- Tap
and select Instrument / Adjust.
Make sure that the instrument is accurately leveled and that the compensator is enabled.
Select Instrument Functions icon
Select Level
Make the adjustment to the Sighting and Trunnion level on the tribrach.
Select Accept once the instrument is accurately leveled.
Once leveled, select Next.
The instrument will turn to face 2 and start moving 360 degrees.
Once the instrument is around back the start point, it will turn back to Face 1.
Select OK.
On a Trimble total station, you must perform the HA VA collimation and the trunnion axis tilt adjustments together.
Final collimation values must be within tolerance of standard values. If not, the instrument needs to be adjusted mechanically. For more information, contact your local Trimble service provider.
-
Position the instrument as follows:
- For HA VA collimation, the instrument must be at least 100 m from the target and the angle to the target must be less than 3° (3.33 gon) from the horizontal plane.
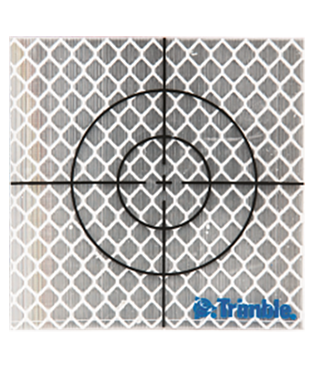
- Best target to use is a reflective target

-
- For trunnion axis tilt, the angle to the target must be at least 30° (33.33 gon) from the VA measured during collimation.
-
Select Collimation & Trunnion axis tilt.
Current adjustment values for the instrument are shown.
- Select Next
-
Aim at the target and take the collimation measurement.
Do not use Autolock during collimation or trunnion axis tilt tests.
You must take a minimum of one observation on each face. If you take more than one observation, complete all observations on face 1 first. Between each observation, turn the instrument away and then re‑aim.
- Select Measure after re-aiming the instrument to the target.
- 3x measurements is the minimum
- To change face, tap Chg face and observe the same number of observations on face 2 as you observed on face 1.
- Follow the same process as Face 1.
Once HA/VA Collimation is complete, it will prompt to measure trunnion axis tilt.
Select Yes.
- Same process as HA/VA Collimation, Aim at the target and take the collimation measurement.
-
Do not use Autolock during collimation or trunnion axis tilt tests.
- You must take a minimum of one observation on each face. If you take more than one observation, complete all observations on face 1 first. Between each observation, turn the instrument away and then re‑aim.
- Select Measure after re-aiming the instrument to the target.
- 3x measurements is the minimum
- To change face, tap Chg face and observe the same number of observations on face 2 as you observed on face 1.
- Follow the same process as Face 1.
The Collimation and Trunnion Axis Tilt is complete
- Select Accept to view the values.
The current values and the new instrument values are shown.
- Tap Accept.
The new values have been applied to the instrument.
MORE INFORMATION
For additional information or assistance, contact 1800 800 874 or email support@upgsolutions.com
Comments
0 comments
Please sign in to leave a comment.